

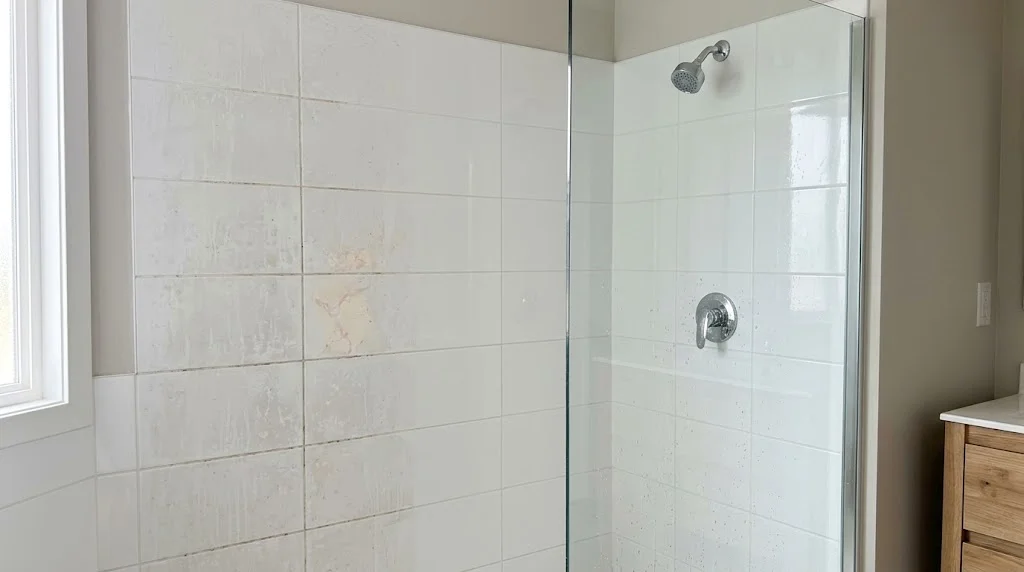
Stepping into a shower surrounded by cloudy walls and discolored grout can make an entire home feel neglected. Between daily hygiene routines, steam, and hard tap water, bathroom surfaces take a continuous beating. Understanding how to clean bathroom tiles properly does not require harsh industrial fumes or hours on your knees scrubbing until your arms ache. With the right chemistry, smart tools, and a consistent routine, you can dissolve years of stubborn buildup and bring back that showroom shine.
Here is the exact blueprint to tackle wall tiles, textured floor tiles, and porous grout lines safely without damaging delicate glazes.
The Quick 5-Step Routine to Clean Bathroom Tiles
If you need a fast, effective reset before guests arrive, this straightforward sequence gets the job done in under half an hour:
-
Loosen Grime with Steam: Turn your shower on hot for five minutes with the bathroom door closed. The warm vapor softens dried soap scum and opens up porous grout lines.
-
Apply Your Cleaning Agent: Spray a natural tile wash or spread an active baking soda and hydrogen peroxide paste generously over dirty sections.
-
Allow Dwell Time: Let the solution sit undisturbed for ten to fifteen minutes. Giving the active ingredients time to break down minerals prevents unnecessary scrubbing.
-
Agitate Gently: Work over the surface using a soft nylon bristle brush or microfiber pad. Concentrate on the grout joints and lower corners where moisture collects.
-
Rinse and Buff Dry: Wash away all residue thoroughly with warm clean water, then immediately wipe the surface with a dry microfiber cloth to prevent water spots.
Following this simple sequence delivers a fast turnaround when learning how to clean bathroom tiles on a tight schedule.
Know Your Material: Tile and Grout Safety Rules Before You Begin
Before mixing any homemade remedies or grabbing a bottle off the shelf, you must identify the material covering your walls and floors. Using the wrong cleaner can strip the finish, dissolve sealers, or permanently pit natural stone.
Glazed Ceramic and Porcelain Tiles
Porcelain and ceramic are the workhorses of modern bathrooms. Because they are fired at high temperatures and sealed with a glass-like protective glaze, they are remarkably durable. These surfaces tolerate mild acids like diluted white vinegar spray, gentle alkaline washes, and high-heat steam cleaners without complaint.
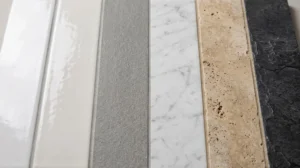
Natural Stone Surfaces: Marble, Travertine, and Slate
If your bathroom features marble, limestone, travertine, or slate, set the vinegar and citrus cleaners aside completely. Acidic liquids chemically react with the calcium carbonate in natural stone, creating irreversible dull patches known as etching. Natural stone tile care demands a pH neutral tile cleaner, gentle Castile soap, or warm water paired with non-abrasive microfiber pads.
Cementitious vs. Epoxy Grout Lines
Standard cementitious grout is porous like a sponge. It absorbs greasy bath oils, hair dyes, and dirty runoff from daily showers. Epoxy grout, by comparison, is plastic-based and non-porous, making it naturally resistant to water absorption and mold. Knowing which type fills your joints dictates how deeply cleaning solutions need to penetrate to lift discoloration.
Essential Cleaning Toolkit: Smart Tools Over Brute Force
Scrubbing with excessive pressure can scratch glossy finishes and grind down aged grout lines. Having the right tools makes the process faster and protects your surfaces:
-
Medium-Bristle Grout Brushes: Narrow angled brushes allow you to channel your scrubbing power right along recessed lines without abrading tile faces.
-
Microfiber Cloths: These lift away lifted grease and grime rather than pushing dirty water around the surface.
-
Power Scrubbers and Drill Attachments: A cordless power scrubber or soft nylon drill brush attachment eliminates hand fatigue on large shower stalls. Always keep drill speeds low to medium so you do not generate excessive friction heat that could crack glossy ceramic glazes.
-
Handheld Steam Cleaners: When seeking an answer for how to clean bathroom tiles without using harsh chemicals, pressurized steam is unbeatable. The high heat liquefies soap films, kills mildew spores, and sanitizes joints effortlessly.
Diagnosing Your Grime: 3 Proven DIY Cleaning Solutions
Different stains require different chemical reactions. Choosing the right homemade remedy ensures you lift the stain on the first try.
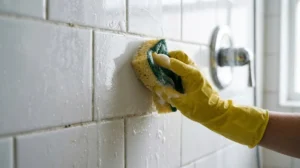
1. Daily Soap Scum and Body Oils: Dish Soap and Warm Water
Body washes, bar soaps, and hair conditioners leave behind fatty acid residues that stick stubbornly to vertical walls. A simple mix of standard dishwashing liquid and warm water cuts through these oily binders effortlessly. Dish soap is formulated specifically to break surface tension and degrease, making it an ideal first line of defense for routine weekly upkeep.
2. Hard Water Stains and Limescale: Diluted White Vinegar
White chalky spots and mineral crusts around shower heads are caused by calcium and magnesium left behind when water evaporates. A 1:1 mixture of warm water and distilled white vinegar dissolves these alkaline mineral deposits quickly. Spray the solution, wait ten minutes for the mild acid to dissolve the mineral bonds, and rinse clean. Remember to reserve this treatment exclusively for ceramic and porcelain, keeping it far away from natural stone.
3. Mold, Mildew, and Deep Grout Stains: Baking Soda and Hydrogen Peroxide
When discoloration sinks into porous grout joints, a thick paste made from baking soda and 3 percent hydrogen peroxide provides dual action. The baking soda acts as a gentle, non-scratch abrasive, while the hydrogen peroxide functions as an oxygen bleach alternative, lifting dark pigments, killing bacteria, and brightening discolored lines without the harsh fumes of chlorine bleach.
The Pink Biofilm Factor: It Is Not Actually Mold
Many homeowners notice a slimy pink or light orange film accumulating around caulk beads, corners, and tile drains. While frequently called pink mold, this residue is actually an airborne bacterium named Serratia marcescens.
This bacterium thrives on the phosphorus, fatty acids, and moisture present in soap scum and shampoo drips. Standard bathroom surface wipes often fail to eradicate it because the bacterial biofilm creates a protective shell.
To eliminate it permanently, spray the affected area with undiluted 3 percent hydrogen peroxide. Let it dwell for fifteen minutes to break down the bacterial matrix at a cellular level, then scrub clean with an old toothbrush and rinse. Improving bathroom airflow helps prevent this stubborn bacterium from returning.
Step-by-Step Deep Cleaning Guide for Bathroom Wall and Floor Tiles
Mastering how to clean bathroom tiles across both vertical walls and flat floors requires a structured approach to prevent dirty water from settling into fresh areas.
Step 1: Pre-Treat and Open the Surface
Clear all shampoo bottles, loofahs, and bath mats out of the room. Sweep or vacuum floor tiles to remove loose hair, dust, and lint that would otherwise turn into sticky sludge when wet. Run hot water to mist the walls and soften dried-on grime.
Step 2: Apply Your Targeted Cleaner
Work from the top of your wall tiles downward so runs and drips do not create streak lines on dry surfaces below. Apply your chosen cleaning solution generously. If you are using a hydrogen peroxide and baking soda paste on the grout lines, work it into the crevices with a sponge or detail brush until every line is evenly coated.
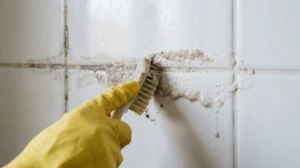
Step 3: Agitate Safely
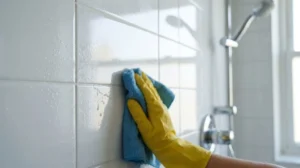
Let the solution sit for ten to fifteen minutes. Once the dwell time has passed, work your grout brush along the joints with moderate, steady strokes. Use broad circular motions with a microfiber sponge across the flat surfaces of the tiles to lift loosened film without scratching the glaze.
Step 4: Rinse with Clean Water
Rinse the walls thoroughly using a handheld shower wand or a clean bucket filled with fresh water. Do not let cleaner residue dry on the tile face, as evaporated cleaning solution leaves behind a cloudy, sticky film that attracts fresh dirt even faster.
Step 5: Buff Dry to a High Shine
Never allow cleaned bathroom surfaces to air dry on their own. Take a clean, dry microfiber cloth and buff the tiles dry from top to bottom. This crucial step removes microscopic mineral deposits and ensures a streak-free, brilliant finish.
Textured Matte vs. High-Gloss Tiles: Adjusting Your Technique
Modern bathrooms feature diverse finishes, and learning how to clean bathroom tiles means matching your method to your finish type.
-
Textured and Matte Tiles: Matte tiles offer great slip resistance, but their micro-textured surfaces easily trap chalky detergent residues and hard water deposits. Avoid thick, pasty cleansers that get caught in the texture. Use liquid dish soap solutions paired with a medium-stiff brush to work dirt out of the crevices, followed by a double rinse.
-
High-Gloss Glazed Tiles: Glossy tiles reflect light beautifully, but they show water spots and streaks immediately. After cleaning, apply a 50/50 mist of distilled water and isopropyl rubbing alcohol, then buff with a dry glass-cleaning cloth to bring out an effortless, mirror-like gleam.
Cleaning Caulk vs. Grout: Avoiding Costly Moisture Damage
A common mistake made when figuring out how to clean bathroom tiles is treating flexible silicone caulk the exact same way as hard cement grout.
Silicone caulk runs along the expansion joints where walls meet floors, or where tiles meet bathtubs and shower pans. Scrubbing caulk vigorously with stiff-bristled brushes tears the delicate silicone seal away from the tile edge, allowing water to leak into the wall cavity behind.
Furthermore, if you see black mold spots underneath clear or white caulk, no amount of scrubbing will clean it away. The mold has rooted itself behind the caulk layer. In these situations, avoid wasting energy on scrubbing: cut out the compromised bead with a caulk tool, treat the joint with rubbing alcohol, and lay down a fresh bead of mold-resistant silicone caulk.
Costly Tile Cleaning Mistakes You Must Avoid
Protecting your bathroom investment means knowing what products and techniques should never enter the space:
-
Mixing Bleach with Acids: Never combine chlorine bleach with vinegar, ammonia, or acidic cleaners. The chemical reaction produces dangerous, toxic chloramine gas.
-
Scouring with Steel Wool or Pumice: Abrasive pads, wire brushes, and pumice stones easily scratch protective glazes, leaving permanent dull scuffs that trap dirt even deeper.
-
Over-Bleaching Colored Grout: Chlorine bleach degrades the bonding polymers in modern grout formulas and causes colored grout to fade into a patchy, bleached-out mess over time.
-
Leaving Cleaners to Dry Out: Letting cleaning solutions dry onto tile surfaces causes chemical etching and deposits stubborn salt residues that are harder to remove than the original stain.
The Low-Effort Prevention System: Keep Tiles Clean Longer
Once you have mastered how to clean bathroom tiles and completed a deep reset, you can avoid regular heavy-duty scrubbing by adopting a few effortless habits:
1. The 30-Second Squeegee Habit
Keep a small rubber squeegee hanging in your shower stall. After the final shower of the day, spend thirty seconds pulling standing water off the walls and glass doors down into the drain. Removing excess moisture eliminates the water supply that hard minerals and mold spores need to form.
2. Boost Ventilation
Run your bathroom exhaust fan during showers and leave it on for at least twenty minutes afterward. If you do not have an exhaust fan, crack the bathroom window and open the door to drop indoor humidity below fifty percent, stopping fungal growth in its tracks.
3. The Water Drop Test for Grout Sealing
Grout needs periodic resealing to remain water-resistant. To check your grout, splash a few drops of tap water directly onto a dry grout line. If the water beads up, your sealant is intact. If the water quickly darkens the grout joint and absorbs, it is time to apply a high-grade penetrating grout sealer. Sealing takes less than an hour and keeps dirt from penetrating the pores for up to two years.
FAQs
Can I use vinegar on all types of bathroom tiles?
No. Vinegar is an acid that works wonders on glazed ceramic and porcelain, but it should never be used on natural stone tiles like marble, slate, or travertine. The acid will etch and dull the polished surface of the stone permanently.
How often should I deep clean my bathroom tiles?
For an average household, a light weekly wipe-down paired with daily squeegeeing keeps buildup under control. A comprehensive deep clean of both the tiles and grout lines is usually only needed once every three to four months.
What is the fastest way to brighten yellowed grout without chlorine bleach?
Make a paste using two parts baking soda and one part 3 percent hydrogen peroxide with a squirt of liquid dish soap. Spread it over the discolored lines, let it bubble for ten minutes, scrub lightly with a grout brush, and rinse clean. The oxygenating reaction lifts stains safely without degrading the grout structure.
Why do my bathroom tiles feel sticky after mopping?
A sticky film usually means too much cleaning solution was used or the floor was not rinsed with clean water. Detergent residues act like magnets for dirt and lint. Mop the area with pure hot water to strip away the remaining soap film, then dry with a clean cloth.
Understanding how to clean bathroom tiles effectively comes down to identifying your tile type, matching the right solution to the specific stain, and maintaining the surface with simple daily habits. By implementing this method, your bathroom surfaces will stay bright, hygienic, and welcoming year-round.




Leave a Reply